June 23, 2012

This and That

I've almost recovered from the Quilt Symposium of Alabama.  I should probably say I've almost recovered emotionally from having to leave the Quilt Symposium of Alabama.  It was hard to go back to work last Monday after having so much fun in Birmingham.  The Symposium was hosted by the Evening Star Quilt Guild, and they did such an amazing job putting everything together.  The quilt show was excellent, I wanted to buy everything in the vendor mall, and I had so much fun in the classroom.  Even though hosting an event that big was an enormous job, the Evening Star folks made it seem like quilting fairies put everything together by magic.  No worried looks, no swearing, no crying -- just smiling faces everywhere. 

These are a couple of my favorite smiling faces.  Terry on the right (my "boss") was the event coordinator.  At least I hope she was, because people were always asking her for stuff.  Mary on the left is Terry's sister, a non-quilter, who volunteered to help with the Symposium.  I wonder if she knew what she was getting into. :-)  She must have walked 8,000 miles. 


These three (Beverly, Ella, and Sandra) always looked like they were having way too much fun.  They sure made me giggle.  And check out those yo-yo hats.  Adorable, right? 


Yes, it took this many people to guard the opportunity quilt so I wouldn't run off with it.  It was fabulous!


It was really cool to meet a fellow blogger, Lisa (right).  She's adorable!  She's helping Judy hold up a quilt that Judy made using the Over and Under pattern from my book.  Judy made only a quarter of the blocks, added red "berries" and a bow, and it looks like a beautiful Christmas wreath!  Unfortunately, my photography skills are terrible, but trust me when I tell you this was really pretty.


Here's a whole family of quilters -- Betsy, Suzie, and Gary.  Betsy was in one of my classes.  What a sweetheart.  And a mess.  She kept me in stitches.  Pardon the pun.  Gary won awards for his hand quilting, including the Judge's Choice award.  They're such sweet people, and I wanted to bring them home with me. 


Here are pictures of one of Gary's award-winning quilts, My Blue Heaven.


Can you believe all the stitches in this quilt?!  It's easy to see why it's adorned with ribbons. 


By the way, thank you, Meg, for changing the settings on my camera so that my pictures aren't dark as night.  I'll read the manual, I promise. :-)


I squealed when I walked into the quilt show and saw a quilt made from my Summer Breeze pattern.  It's such a lovely version made with batik fabrics and an extra border.  I later discovered that it was made by one of my students, Shirley.  And of course I squealed again when I found out it was her first quilt


She did a fabulous job!


I couldn't take my eyes off this quilt, so I had to buy the book.  So many great ideas for string quilts.  And so many more to add to my bucket list. 


If you're in the Birmingham area, check out the Evening Star Quilt Guild.  Lots and lots of very nice people and super-talented quilters.  And be sure to give all of them a hug from me. :-)

Have a super weekend!

Kim

June 2, 2012

Has it really been that long?

It was never my intention to take such a long break from here.  I've been working on a big project, while still working at what Sinta calls my "big-girl job."  The days turned into weeks, the weeks into months, and people began e-mailing to ask, "Where are you?!!"  Thank you so much to all of you who have e-mailed or called.  If I haven't responded to your e-mail yet or haven't visited you to see what you've been up to, it won't be long, I promise.  Things are almost back to normal, or at least as normal as things can get.

I'm working on class sample blocks this weekend for the Quilt Symposium of Alabama next week.  If you're there, please stop by for a visit.  I'm dying to check out the quilt show.  

And when I get back, I'll give you an update on my progress with these.


And maybe my plans for this little fat eight bundle of Lucy's Crab Shack.  Such perfect beachy prints by Sweetwater.  I'm smitten with the tiny T-shirts.  


Hope you're having a great weekend!

Kim

January 31, 2012

Winner Announced

Sooooo sorry for the delay in announcing the winner of a copy of Scrap-Basket Sensations!
I got sidetracked this weekend with, among other things, this project. 


I won't even go into the "among other things" part -- too long and boring. The exciting news is that the winner has been determined by the random number generator.


Congratulations, Nicole!  If you'll send me your mailing address, I'll send your book.  Thank you all for playing along.  If you missed the Sew Scraps Along over at Pleasant Home, hop on over and check it out.  And don't forget to enter the drawing for the grand prize giveaway while you're there. 

Have a super week!

Kim

January 23, 2012

Sew Scraps Along

Have you been following along with Jodi during her month-long Sew Scraps Along over at Pleasant Home?  If not, you've really missed some fabulous posts full of scrappy inspiration -- featured bloggers, featured tutorials, photographs of incredible quilts, prizes, and Jodi's own scrappy projects.  (I wonder if she sleeps.)  If you love scrappy quilts as much as I do, scoot on over there. 

This week, Jodi is featuring my tutorial for the 60-Degree Quilt.  She'll be sharing her version of this quilt, and I'm so anxious to see it. 


You can find the first and second parts of the tutorial here. I've had to put this project aside for just a while to finish some other things, but I'll get back to it soon and show you how I put the blocks together.  This has been such a fun quilt to make -- every block is a surprise.  And it's a great project for using up lots of scraps.

As part of the Sew Scraps Along, I'm giving away a copy of my book, Scrap-Basket Sensations.  If you'd like to win a copy, just leave a comment here.  Comments will be closed Saturday at midnight.  Good luck!  And have fun over at Jodi's!

Kim

December 29, 2011

This and That

Is it me, or has this year passed by at the speed of light?  Although I've never had a panic attic, I thought I might be having my first one a few weeks ago when I heard Christmas music on the radio.  I've been absent here for a little while, but I hope you're all enjoying the holiday season. 

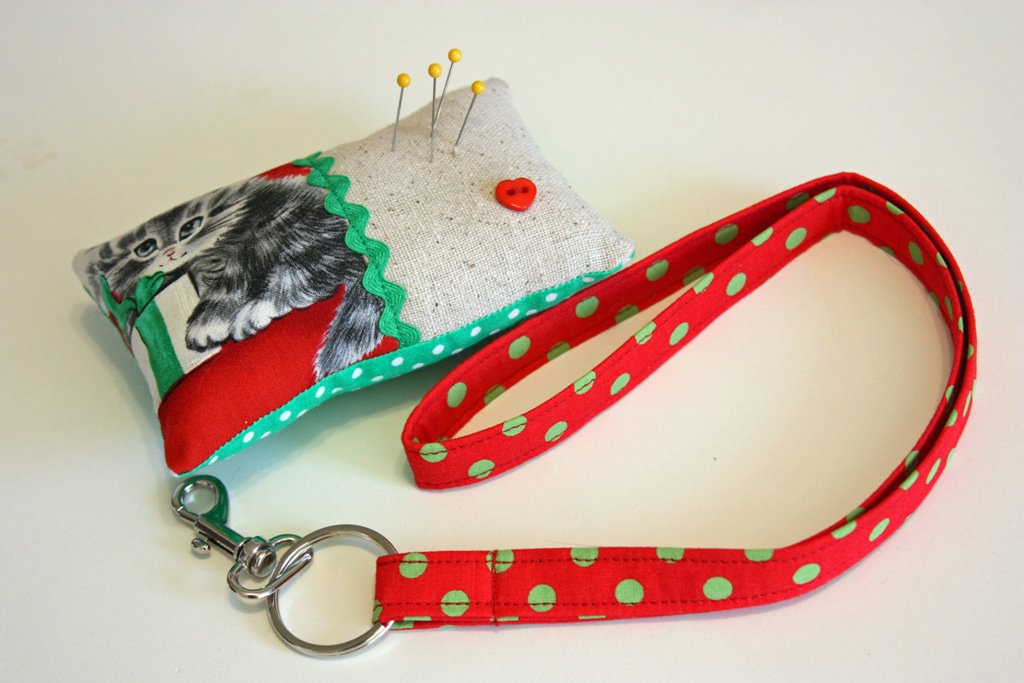
A few weeks ago, I received a sweet little package from Stephanie (Loft Creations).  She made a key leash for me, and an adorable pincushion with kitty fabric.  And polka dots!  She sent me a package of polka dot charm squares from her stash a while back, and now I'm compelled to buy every polka dot fabric on the planet.  Thanks so much, Stephanie, for the pincushion and  key leash, and for sharing the number for the polka dot intervention hotline.  Not that I intend to use it. 


If you'd like to make your own key leash, Stephanie has a great tutorial for it here.  If you're not familiar with Stephanie's work, she's a very talented pattern designer, so stop by and check out all her beautiful designs.  You can find them online in her Etsy store or at Connecting Threads

And then another package came in the mail from Mary at Quilt Hollow.

 
She made a tiny little quilt using Blessings fabric left over from the "Blessings from the Hollow" quilt she made for my book, Scrap-Basket Sensations.  Blessings from the Hollow lives with Mary now, and every time we chat, I whine about not having it because it was one of my favorite quilts.  She knows I'm just teasing.  Mostly.  :-)   I love the fabric collection, and I recently ordered a fat quarter bundle while I could still find it.  Thank you so much, Mary!  It's such a special gift.  It lives in my office at work now where I can enjoy it all day long. 

I shared pictures earlier of a few batik Courthouse Steps blocks I was working on for the Northwest Florida Paralegal Association's charity auction.  I forgot to share pictures of the finished quilt.  Here is is with its new owner.


She seemed very excited to win the quilt, and I'm very happy the quilt went to a good home. :-) 

Happy New Year to everyone!

Kim

November 20, 2011

60-Degree Quilt Tutorial - Part 2

If you missed the first part of this tutorial, you can find it here.  I'll add a button to my sidebar so you'll be able to find all the parts in one place if you decide to try it out later.  I'm figuring it out as I go, and I'm pretty sure there will be at least one more part, maybe two.    

Are you wondering how all of these pieces will fit together?  Me, too.  :-)  I have a lot of triangle units put together, and not a single one is the same size.  These are just a few of my units, and you can tell by looking at the bottom right corners how different they are.  It really doesn't matter, though. 


Separate your triangle units by size.  In the picture below, the two triangles on the left are almost identical.  The one on the right is just a little bigger.  When I'm ready to sew these into rows, I'll sew the triangle units together, then trim off the top of the unit on the right.  Remember that this isn't a "triangle quilt."  The important thing is that you cut everything at a 60-degree angle.  Your triangles will appear throughout the quilt accidentally.  And as you get into it, you'll probably figure out how to make a few triangles on purpose.


Filler Strips

I don't have quite enough triangle units put together to begin sewing them into rows yet.  But I'm thinking ahead (for once in my life), and anticipating that I'll need another large triangle here or there to fill up a row, or maybe an extra couple of inches to make some rows long enough without having to add an entire triangle unit.  So I'm making some "filler strips" as I go.  Here are some examples of a few.  I've highlighted the 60-degree line in yellow again, but you can go to the first part of the tutorial for more complete instructions. 

Example 1

Cut a few short strips the same width.  The length doesn't matter.  You can cut longer or shorter strips, depending on how long you want your filler strip to be.  The width of these strips is 2 1/4".
  

Stack your strips so that the ends on the right are aligned.  Trim.


Rotate the strips so the trimmed ends are on the left.  Re-stack them so the uncut ends are aligned.  Trim.

Lay out your 60-degree shapes and decide how you'll sew them together.


Place two pieces right sides together, and offset them so that the 1/4" seam allowance begins at the  "valley" where the two pieces meet (see yellow arrows below).


Add the third shape, and you have a filler strip ready to use where you need to enlarge a triangle unit or fill in some space later.


This strip was the perfect size to add to a smaller triangle -- just a tiny bit longer than the triangle unit.

Sew the filler strip to any side of the triangle unit.


Trim the extra fabric from the filler strip.


Rotate, then trim the other side of the filler strip.

Example 2
This filler strip is a little fussier, but I like all the triangles in a row.  I'll probably use this to fill in space between two triangle units when I sew the rows together.  Start with two scraps of fabric.  Looks like these are between 2 1/4" and 2 1/2", but you can use any size.  I'm working with small scraps, but you can make your filler strip wider if you use larger scraps.


Trim the top strip at a 60-degree angle.

Rotate, then trim the other side of the top strip.


Now trim the bottom strip.

Rotate, then trim the remaining side of the bottom strip.  You should have a 60-degree diamond shape. 

Sew a strip to the diamond shape.  The yellow strip below is wide enough to end up with a triangle after trimming.


If you'd like to make sure you maintain the triangle points in your filler strip, trim the extra strip so that the quarter-inch line of the ruler intersects with the seam line a quarter of an inch from the bottom of the filler strip (see yellow star in the below picture).     


Trim the yellow strip.

Rotate, then trim again.


Sew another strip to continue making the filler strip.  The green strip below isn't wide enough to make a full triangle, but it doesn't matter.  Just keep sewing different sizes of strips and see what happens.

Trim the strip.

Rotate, then trim the other end of the strip.


Sew another strip of fabric to continue making the filler strip.  Trim. 

This time, I trimmed to make a diamond shap instead of a triangle.  Doesn't matter -- just maintain the 60-degree angle throughout the filler strip.

Just keep sewing and trimming until your filler strip is the length you need.


Example 3

In this example, I sewed a few long strips together, then cut triangles and a few filler strips.  I'll probably use these filler strips for building triangle units.  Sew together a few strips, then trim at a 60-degree angle on the right side. 


Cut to make a triangle.


Cut again to make another triangle.


To cut filler strips, place a line of the ruler along the trimmed edge of the strip set. 


Continue cutting strips.  Save the leftover piece on the end -- you may be able to use it for edge blocks later.


Be back later to show you what I'm doing with edge blocks.  To all of you who celebrate Thanksgiving, hope you're having a wonderful holiday weekend.  

Kim